Showing posts with label Tutorial. Show all posts

Tuesday, October 8, 2013

See Clear FIERCE Theatrical Contact Lens Product Review | Halloween Contacts


Heyyy spooksters! Who is excited about another Halloween-themed review??? I know I am! Today's review is actually Part 2 of my See Clear review that I began last month. I thought it would be best to separate the circle lenses from the Fierce lenses, so that I could save these awesome lenses for a Halloween review. >:D Today is your lucky day!


These lenses are Red Vampire and White Out from See Clear's FIERCE Collection. I am so excited to review these today because I LOVE costume lenses! These definitely give off a creepy effect. Let's start with White Out, which you can buy from EyeStylez!


Here is the box! I like how they labeled what it is on the back, though with the Fierce lenses, it's pretty obvious. It would be a nice touch with circles which can often be much closer to each other in design! Let's open it up!


The Fierce lenses are both in individual containers. You just peel back the silver coating to get to your sealed, fresh lens.


Here is what White Out looks like! Pretty dang white!

For this look, I wanted to do something creepy. Something ghostly with blacked out eye sockets and haunting white eyes. A quick run to the store and I came back with all my Halloween makeup needs for $4~

Instagram: @alexapoletti

For the first look, I used the white base and the black crayon from the vampire kit to create my haunting look. This is a very basic makeup look, so I made a QUICK photo tutorial of the steps to create it.


 First, use the white base to cover your face (Photo 1) I was hoping it would dry but it never did, so I ended up using some powder to set it. Then I used the black crayon to color black circles around my eyes (Photo 2). I smeared it out with my finger. It's very creamy so it's easy to smear. Then to make it darker and to set the black, I did a layer of black eyeshadow on top of the black crayon (Photo 3). Tap the eyeshadow on instead of dragging it across your lid. This helps it stay fully pigmented and helps control fallout. Then I drew black lines/cracks/veins/whatever coming out of the black eye sockets with the black crayon (Photo 4). Then put in the See Clear FIERCE White Out lenses (Photo 5). Pop on a GLW and you're ready to scare your neighbors!


Boo! Mwahaha... I fully enjoyed sitting in the window and scaring people.


I couldn't resist this opportunity to grab some awesome Halloween studio shots. I added some crazy teased out pigtails to Gothic Lolita Wigs new white bob & here ya go!~


Channeling Bellatrix Lestrange in this one. >:D


Ahh!! Scaring myself! >.<


MWAAAAHAHAHAH I LOVE BEING CREEPY.


Overall Rating
Design~ 5/5
These are exactly what they try to be.

Color~ 5/5
Definitely makes any color eye look white.

Enlargement~ 0/5
This lens is designed to make your eyes look like it has no iris.

Comfort~ 3/5
The small hole to see through impairs vision slightly. It's much better than full white-out lenses that also cover the pupil, so I'll give it a 3/5. I wouldn't wear these too often because of the vision impairment (and because of the sheer terror I would inflict on everyone who glanced my direction).

 Naturalness~ 0/5
This would only look natural on a ghoulish zombie.


Find See Clear's White Out lenses here:
http://eyestylez.com/stylez/beast/white-collection/white-out.html

________________________________________________

Next up.... RED VAMPIRE! WOOOOHOO! Love it!


Oh my gosh. Have I mentioned that I FREAKING LOVE HALLOWEEN?!>!

okay.... focus....

Red Vampire.


It comes in a box with a label "RED VAMPIRE" just like it's creepy White Out brother.


Same packaging as well. It's exciting to see a solid red contact lens staring out at you... Ohhh the possibilities!


!!!!!!!!!

I am not doing a makeup tutorial for this look because it is much more intricate than the ghost look. I hope you understand! :3


Here is how it looks with one Red Vampire lens in. :) FYI~ The lashes used in this look are Dolluxe Lashing Out Loud used on both top and bottom.


They are pretty awesome right!?!?
My Instagram followers LOVED this look when I posted a preview last night. I am excited to launch the photos now! :D
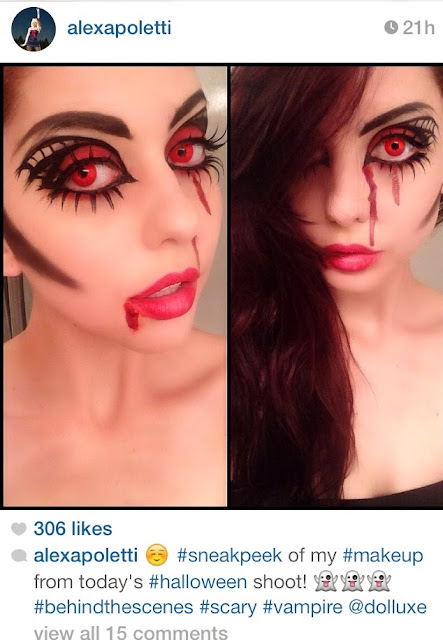


Again, I could not resist the studio shots! Here you go!~


I am going to suck your blood!!! (O,.,O)

A look like this would not be complete without red contacts. See Clear pulling through in the clutch!

Overall Rating
Design~ 5/5
These are exactly what they try to be.

Color~ 5/5
Definitely makes any color eye look red.

Enlargement~ 0/5
This lens is meant to cover the iris and make them appear solid red. It's not intended to enlarge.

Comfort~ 3/5
Same as the white pair above:
The small hole to see through impairs vision slightly. I wouldn't wear these too often because of the vision impairment (and because of the sheer terror I would inflict on everyone who glanced my direction).

 Naturalness~ 0/5
This would only look natural on a blood sucking vampire.


Find See Clear's Red Vampire lenses here:
http://eyestylez.com/stylez/beast/red-collection/red-vampire.html
_____________________________________________________

Well, that's it for today's product review!~ What do you think of See Clear's White Out and Red Vampire? What about my Halloween looks?? Stay tuned for more Halloween review coming soon!

In the meantime, make sure you visit See Clear here:
See Clear

And EyeStylez here:
EyeStylez

And me here:
Alexa Poletti

To have your shop reviewed, email me here:
AlexaPolettiOfficial@gmail.com
with the subject "*Shop Name* Product Review"


xo

Sunday, September 22, 2013

How to Straighten a Synthetic Wig Using the Hot Water Method | Daily Style Post

Hey guys! Today I want to do something a little different. Tutorial time!

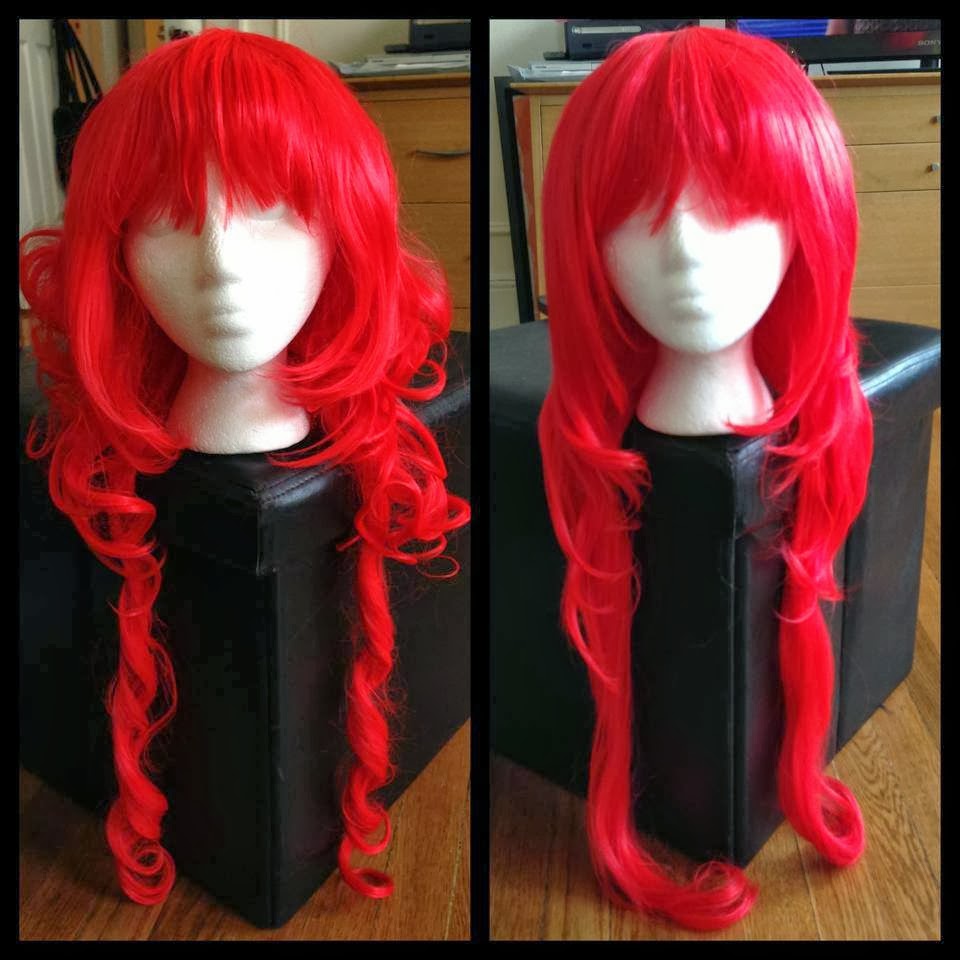
A few months ago, I decided that I wanted to straighten my red Empress wig from Rockstar Wigs. Having always relied on my flat iron, I sat down to watch a movie and straighten a super curly wig on low heat. For this method, you need a hair straightener and more patience than I have. 

After nearly two hours, it looked like this:


Not bad, but not as straight as I had wanted. I would hold the straightener on the ends as long as I dared and they still curled despite my efforts. When straightening high temp synthetic wigs (like wigs from Gothic Lolita Wigs and RockStar Wigs), you have to be really careful not to melt the fibers because there is no way to get them back once they are damaged from heat.

Fast forward to September. I pulled my Empress wig out of the bag that I store it in and... Wtf! It's curly again!!! Noooo! So much effort wasted!  How is this even possible?! 


Time to try another method. I had always heard of the hot water method but had never tried it myself. Now I will never straighten any other way. It is soooo easy! 


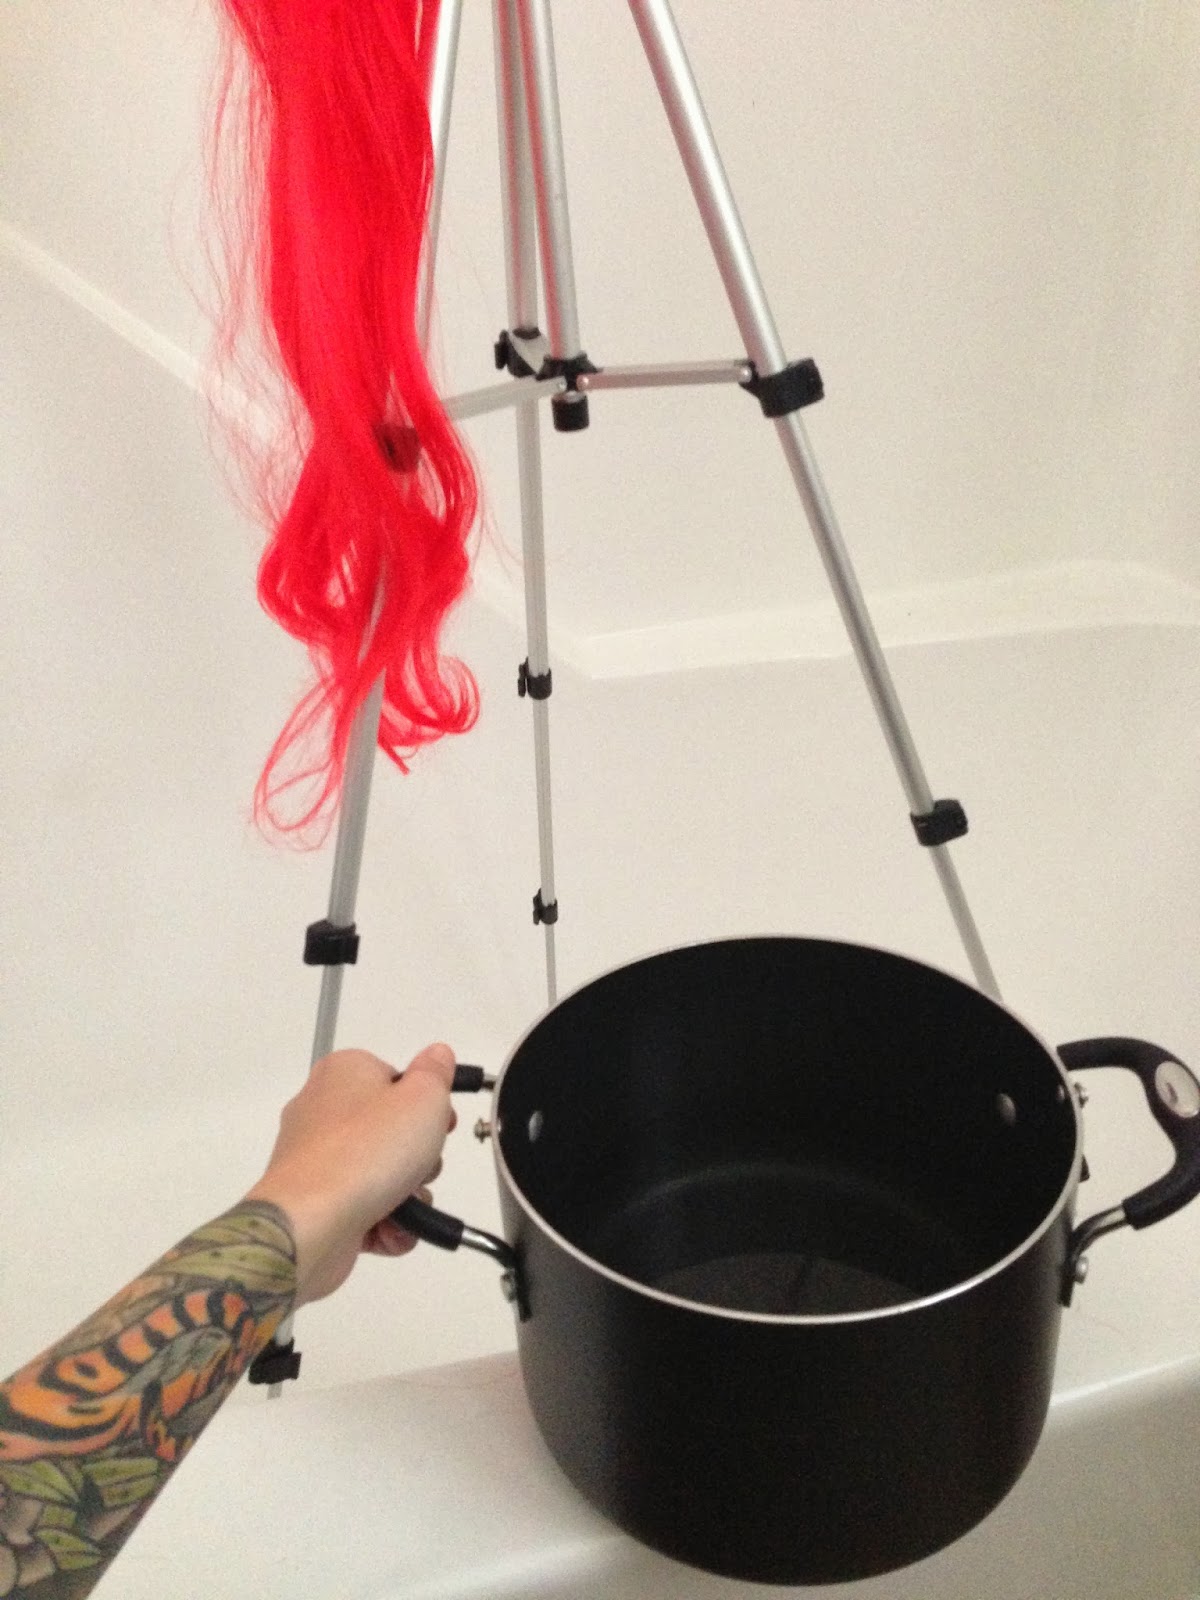
First, grab a tripod or some sort of stand that you will be able to attach your foam head to that will allow your wig to hang completely straight when wet. When I thought of using my regular tripod, I got nervous about drenching it in hot water. However, being a photographer, I fortunately have spare tripods laying around. I picked my cheapest tripod (I think it was like $15USD) for my hot water tester tripod. I'm sure the water wouldn't damage a tripod but I didn't want to take the risk with my nicer one.


Turn the handle of the tripod straight up. It conveniently fits a foam head perfectly and securely. Insert the head onto the handle. 


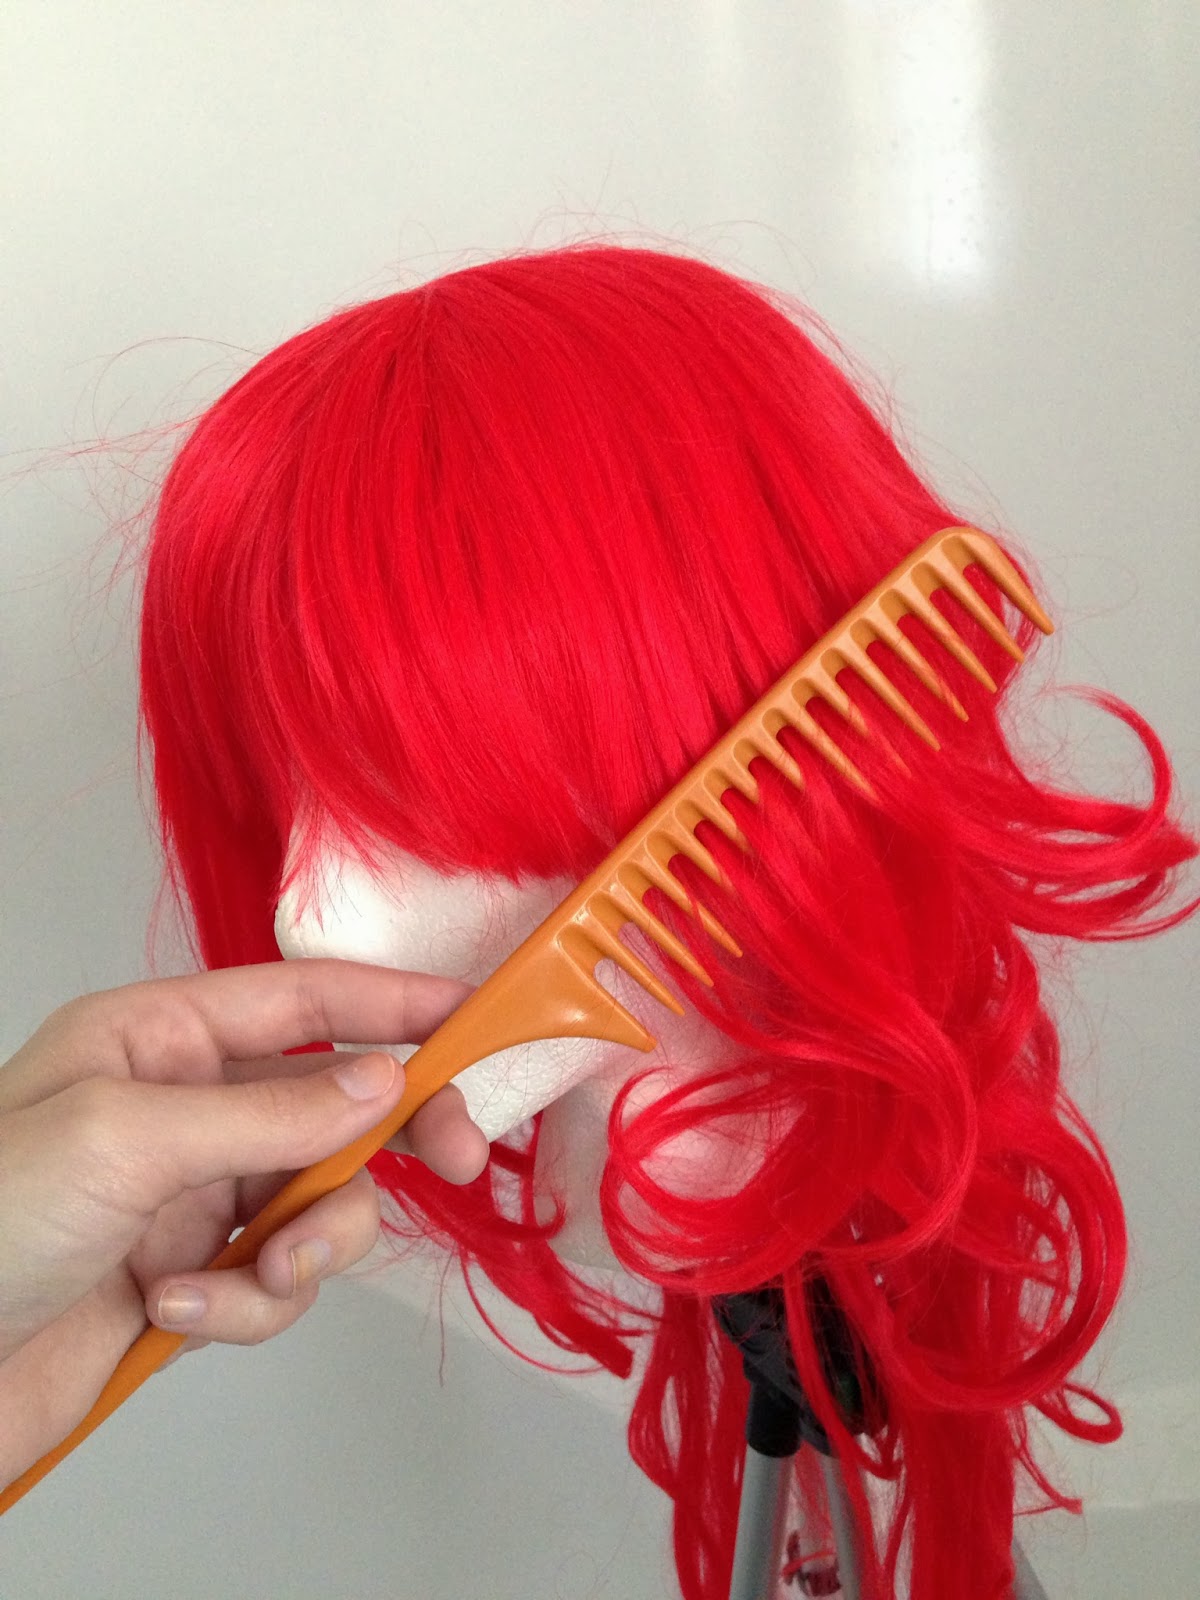
Put the wig on the head. Attach with pins so it doesn't slide off the head during the process. Brush all the knots out of the wig with a wig brush or wide-toothed comb.


Put the tripod and wig in the bathtub. You'll be drenching the thing so you'll want to have it somewhere safe for water.

Fill a pot (or kettle, if you live somewhere that people have kettles XD) with water and put it on the stove. You'll want to keep an eye on it so the water gets hot, but not so hot that you will completely melt the wig. Between 180℉ and 185 is a good temperature.


I'm using a meat thermometer because I don't have a regular thermometer hahah.. Not even sure why I have this. I've been a vegetarian for ten years. Hahaha..  >.<

Once the water is at the ideal heat, say your final goodbye to your wig's curls.


You want to make sure the wig is completely soaked. It would be fine to just start with pouring the water over the top of the wig, but I quickly dipped the ends in the water and swished it around really fast to make sure they got wet. This particular wig style has two long pieces that are much longer than the rest of the wig, so that was a precaution I took to ensure the pieces got wet. 


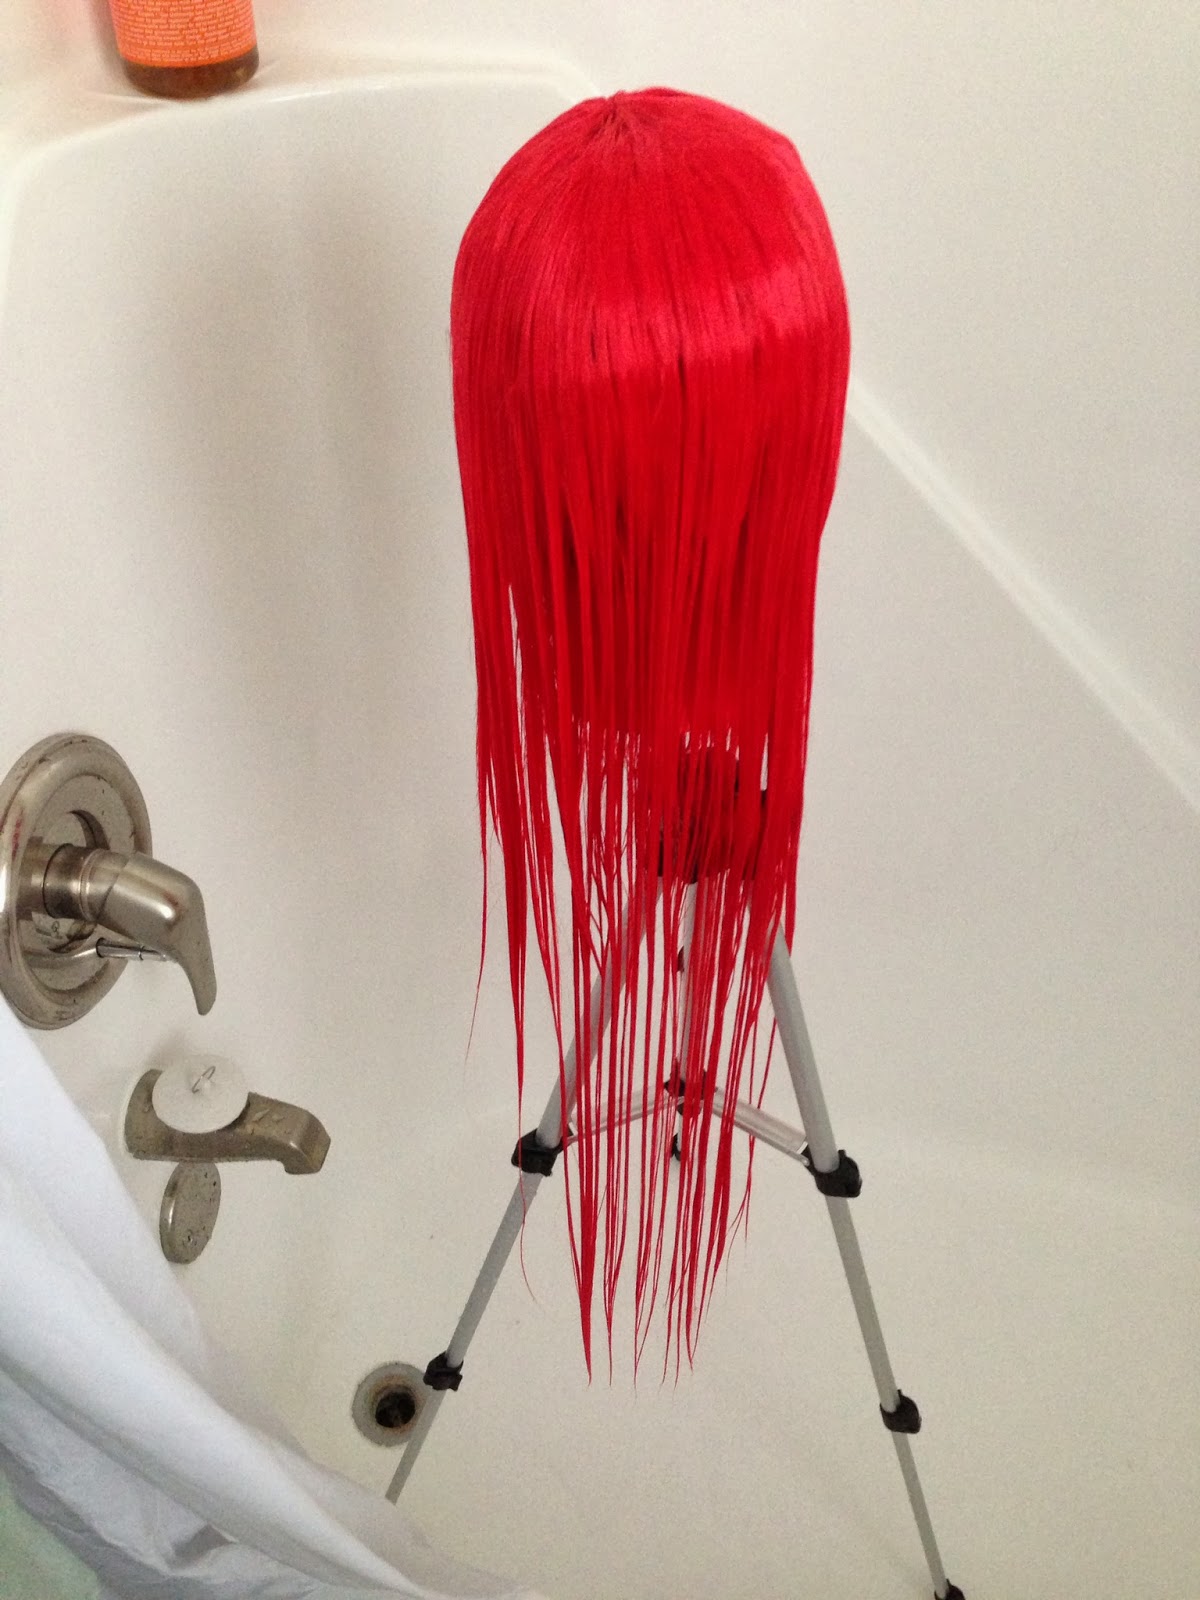
Then you just pour the water over the top of the wig and watch the magic happen. The heat allows the fibers to be reshaped right before your eyes. Remember, the wig must hang completely straight for the wig to dry straight. It may take a few pots to get the wig completely soaked. I think I heated and poured three pots for this wig.


Never brush a wig when it's wet!!! You can mess up the fibers.

Then you just leave it alone and let it dry for a few hours. Allow the wig to dry fully before taking it off the stand. You don't want to risk messing it up because you're impatient. Maybe you can watch a movie or go get ice cream while you wait. :3

And then.... You revisit your wig a few hours later..... And behold... The straight beauty....


!!!!!!!!!!!!

It's soooo pretty when it's straight!!! The layers! They are amazing! It's like a totally different and new wig. 

Check out some before and after shots of the Rockstar Wigs Empress wig in Red


By the way, this wig is on clearance from Rockstar Wigs for $34.50. Get it before it's gone forever!!!

After straightening and falling in love with this wig all over again, I put this outfit together based around the wig. How about this for a Tutorial x Daily Style combo post?! 


Outfit Rundown

Hair: Rockstar Wigs Empress in Red

Lashes: Dolluxe Lashing Out Loud x Underlash B
See my review of these under lashes here:

Contacts: Pinky Paradise Super Size Nudy in Green
See my review of these contacts here: 

Necklace: Tobi Spike Gang Wrap Bracelet (worn as necklace)

Top: Newbreed Girl Tokzilla Girls Tee (altered into a tank)
I don't think they sell this tee anymore, but they have the same print in a hoodie which I like even better!!! Hoodies are a girl's best friend.

Arm Band: Dollface Deconstruction (actually a hair piece)

Cami: off brand/unknown

Shorts: off brand/unknown 

Sock: non-active eBay shop

Boots:  T.U.K. Red Leather Combat Boots


Watch out! We've got a tough guy over here! *growl*
~~~~~~~~~~~~~~~~~~~~~~~~~~~~~~~~

I hope you enjoyed this tutorial and Daily Style post! Are you going to straighten your wigs with the hot water method? I'd love to see your straight wigs in the comments or on my facebook page! xoxoxo

Friday, April 26, 2013

Dolluxe All Dolled Up and Underlash B False Lash Product Review

Hi everyone!~ You may have noticed that I have been pretty quiet over here. I have been traveling a lot between the launch of Dolluxe at Anime Matsuri in Texas, a shoot for Meschantes Corsetry in North Carolina, and attending events here in DC. Needless to say, I've been one busy girl! I think my blogging schedule is going to change from Fridays to whenever I have time. Heheh.. ^.~

Enough about me... Let's get to a review that all of you guys have been asking for. A review of new Dolluxe lashes!

Photo of my lashes from Instagram: @alexapoletti
While I am lucky enough to have the full line of Dolluxe lashes (and be featured on the amazing packaging!!!), I am going to review these lashes separately. I think they are all amazing, are all very different, and all deserve their time in the spotlight. :3 A lot of my fans are new to lashes, so this is going to be a review and tutorial on how to apply lashes mixed together.

I am going to start with my favorite pair for an everyday look for big anime eyes. My favorite combination to achieve this look is Dolluxe's All Dolled Up (#4) and Underlash B (#8). You can buy each set in a 3 pack for $25 or singles for $10 USD.  


My wonderful friend Tin Tin is the perfectly kawaii face on this packaging. Not only is she an adorable model, she is an AMAZING artist. Check out her page and give her a "Like" here: Tin Tin's Facebook and Instagram 

For my top lash, I am going to use All Dolled Up. Each pack of lashes come with a great adhesive if you don't already have lash glue.


My bottom lash is Underlash B which also comes with glue.


*NOTE: Before you apply glue, you should hold the lashes up to your eye first to measure them. Then you should trim the lash strip to fit the length of your eye. Since I have giant peepers, I forgot to photograph this step as I don't normally need to trim mine.  

My current favorite brand of lash glue is DUO which is what I will be using to apply my lashes today. I use the Dark-Tone which is glue that dries black. This is great if you have thick liner because it will just help darken your liner and blend. Just as a general warning: If you are not good at putting on lashes, you should get glue that is white and dries clear so you don't mess up your makeup by getting black glue everywhere. The glue sample that is included with the Dolluxe lashes is white/clear and is a great adhesive. 


To apply the glue, you'll just squeeze the glue until it comes out just a little. You can either apply the glue directly to the lash if you feel like you have control of the glue, or you can put the glue on the end of a makeup brush or pull the cotton off a Q-tip and use that to apply the glue along the strip of the lashes for more control. You want to put the glue on the false lashes, not along your own lash line.

It is very hard to take pictures while doing this... It's a 2-hand process haha. :p

If the strip of this pair looks a little frazzled, it's because I've already used them 3 other times! Since the lashes are so full and don't need mascara, you can use them over and over again!

Wait 15-30 seconds or until the glue is tacky before applying your lashes. If you apply too soon, the lashes won't stay where you put them.

There are tons of different ways to apply lashes. You can use your fingers or tweezers and you can start from the inside or out. Whatever is comfortable and easiest for you. Personally, I just use my fingers and start from the outside. I do the top lashes first.

I start from the outside to make sure that I am placing them in the right place. I usually line the end up right along the end of my lash line, but a lot of gyaru looks will have you place the lash out a little farther than your natural line to give the appearance of a larger eye. 


If you have trouble getting the inside to stick where you want it, you can push it into place with tweezers, the back of a makeup brush, or a damp Q-tip.

After the lashes are in place and feel pretty secure but aren't completely dry, I push the front side up and hold it in place so the lashes stick up and look fuller.


Now it's time to apply the lower lashes! 
Normally I would apply both top lashes first before moving to lower lashes, but I wanted to be able to do a side by side comparison of a completed eye and a lashless eye.

This time, I am going to trim the bottom lashes for a different look. These bottom lashes are beautiful with a full strip as seen here, but today I want to try shortening them! I wanted to trim these where there would just be three big lash sections for my lower lash. If you have smaller eyes and think the longer end is too much for your eye, you could trim it where there are three on the shorter side and it will have the same effect. :)


Trimmmmyy trim trim.
Glue time!


It gets easier the more you do it! Don't forget to wait for the glue to get tacky! 

To apply the lower lash, try to get up underneath your lower lashes so you're not gluing them down to your face. Again, I start on the outside because it is easy for me to find the right placement.


Once the outside is in the right spot, it's easy to move the inside to the right spot! When the strip is smaller like this, it is easier to work with and control. That said, I've found the Dolluxe lashes extremely flexible and easy to apply even with the full length band. The bands are ultra-thin and flexible so they go where you want them to go. I've tried (and failed) with many cheap lashes and trust me. These are worth the price.

Then I touch up my eyeliner on the bottom to help blend the lashes to my natural lash line. For my waterline, I use Urban Decay's pencil in Zero.


Now let's see how crazy I look with just one eye done.... hehehe...


 Wow!!! See what a difference they make? I love false lashes!

Then you just repeat the steps above for your other eye and voila! It really doesn't take nearly as long as it seems in my explanation. I am just trying to be very thorough for the lash newbies. :3   


It's okay to make funny faces while applying. :3

Tada!!!


That's the end of my getting ready process! Then I just post my styling to my fan page and you get something like this:


That's it for Dolluxe's All Dolled Up and Underlash B review! Think you can rock these lashes? I'd love to see pictures of you guys wearing them! If you have any questions about selecting a lash or how to apply them, leave me a comment here or on my Facebook page!

Check out Dolluxe's entire lash line here:

Find more of me here:

Until next time, love birds. <3 xx